From Day 7 onwards, we will explain the basic syntax of Solidity. As a development tool, we will use Remix (an online IDE environment), which was introduced as basic tools of web3. First, we will start with development using Remix and learn about the basic structure of Solidity programs. Let’s delve into the explanation.
Development Flow
In this guide, we will proceed with development in the following order:
- Create a Solidity program on Remix.
- Deploy the Solidity program (place it in Remix’s test environment).
- Execute the deployed program.
For this development, we will use Remix, a site provided by Ethereum and explained as basic tools of web3. Remix is a development environment offered in the form of a website, allowing you to use it easily without installing software on your local PC.
* For more formal development, it is advisable to install development software in a local PC environment.
Creating a Solidity Program on Remix
Open Remix in your browser. In my case, I have confirmed its functionality using Chrome.
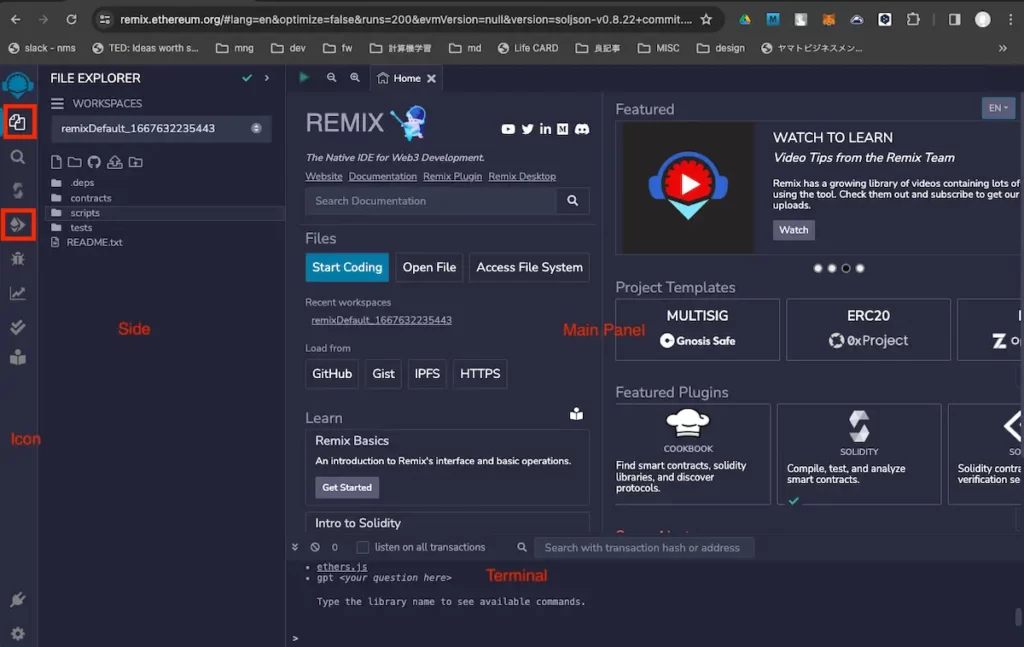
Using the buttons within the red frame on the icon panel, you can switch between the file explorer and deploy & run screens. Create a new workspace by clicking the + button next to WORKSPACES.
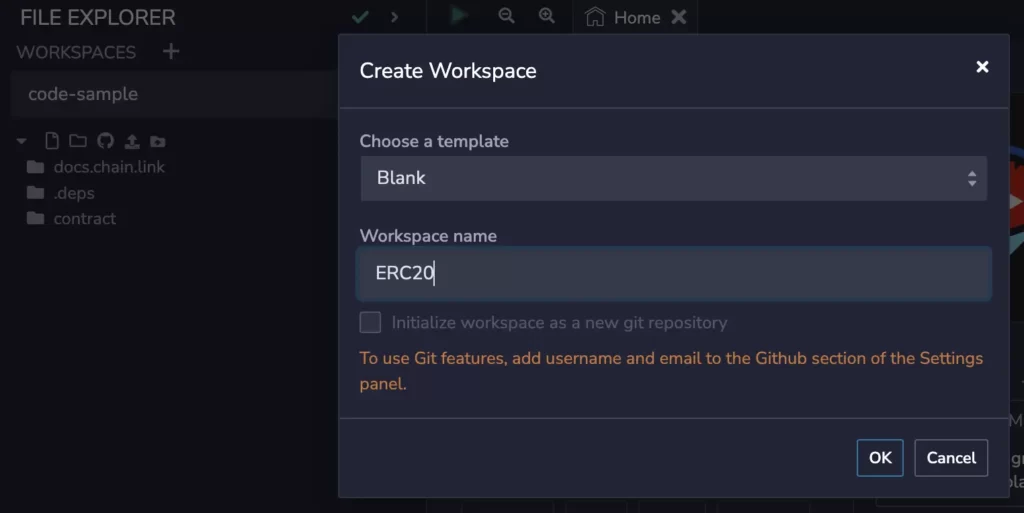
Initially, select ‘Blank’ and then enter a workspace name in the subsequent text input form.
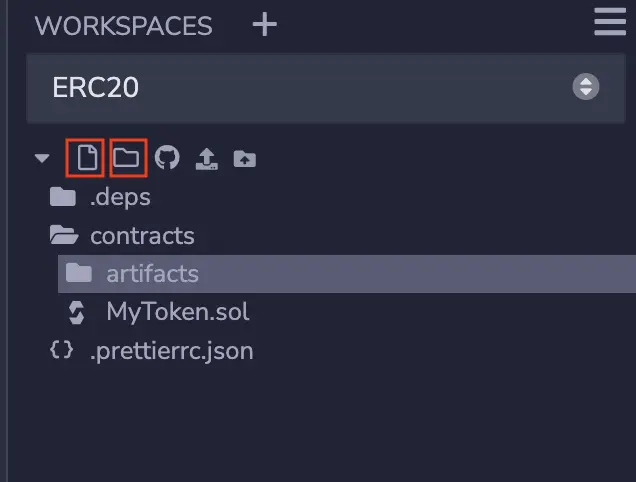
Click on the right red frame to create a folder named ‘contracts’ (where you will place your Solidity program). Click on the left red frame to create a file named ‘MyToken.sol’ (this will be the program you are creating).
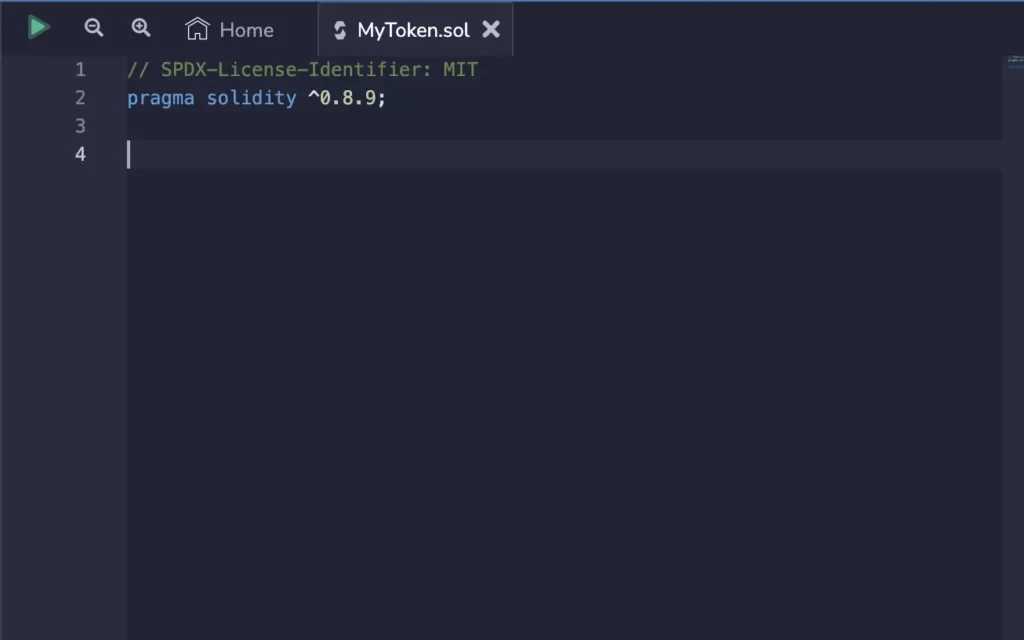
Basic Structure of a Program
The following MyToken.sol is a Solidity program with the most basic structure, close to the simplest form. Particularly, lines 1, 2, and 6 include syntax that is written in every contract.
In summary, this program is under the MIT license, operates with the Solidity compiler version 0.8.9 or later, and is a contract that inherits the ERC20 functionality. (ERC20 is one of Ethereum’s standards for tokens (cryptocurrencies), implemented in an external program called ERC20.sol, which is the parent contract of this program.)
// SPDX-License-Identifier: MIT
pragma solidity ^0.8.9;

import "@openzeppelin/contracts/token/ERC20/ERC20.sol";

contract MyToken is ERC20 {
    uint256 initialSupply = 10000000000000000000;
    constructor(string memory _name, string memory _symbol) ERC20(_name, _symbol) {
        _mint(msg.sender, initialSupply);
    }
}
// SPDX-License-Identifier: <License Type>
The opening line specifies the type of source code license. Types of licenses include GPL, MIT, etc., and should be chosen according to the rights you wish to assert.
This method of specifying licenses in Solidity development is common and omits the lengthy descriptions traditionally placed at the beginning of source codes. The types of licenses are listed in this link. The MIT license is commonly used due to its lenient restrictions and ease of use.
pragma solidity ^0.8.9;
The process of converting a program into an executable module is called compilation, and the software that does this is known as a compiler. Here, we are specifying the version of the Solidity compiler. ^0.8.9 means version 0.8.9 or higher. The ways to specify versions include:
– 0.8.7: Only version 0.8.7
– ^0.8.7: 0.8.7 or higher within the 0.8 series
– <=0.8.7 < 0.9.0: Greater than or equal to 0.8.7 but less than 0.9.0
import “@openzeppelin/contracts/token/ERC20/ERC20.sol”;
The import statement is used to directly utilize public libraries. This statement allows us to use the ERC20 contract.
When developing locally, you download the package using package management software (yarn, npm, etc.) and import it by specifying the local path.
contract MyToken is ERC20 {
…
We are defining a contract (a unit of a program) named MyToken, which inherits the functionalities of the ERC20 contract. ERC20 is the parent, and MyToken, inheriting its functionalities, is the child. These two contracts are in a parent-child relationship (known as ‘inheritance,’ to be explained later).
uint256 initialSupply = 10000000000000000000;
Here we are defining a variable (MyToken is actually a token (currency), and this variable determines how much of it to issue). uint256 is a type used for very large numbers (more details to come later).
constructor(string memory _name, string memory _symbol) ERC20(_name, _symbol) {
The constructor is a function that is executed only once when the Contract is actually created. It takes two variables as input (_name, _symbol – these are arguments). This is called ‘initialization,’ defining what values to set and what processes to execute before other functionalities are used.
_mint(msg.sender, initialSupply);
The _mint function is defined in the inherited ERC20 contract. Since MyToken inherits ERC20, it can use functions from ERC20. The process involves issuing the initial currency (known as minting).”
Deploying a Solidity Program
When you click the fourth button from the top in the icon panel, labeled ‘Deploy & Run,’ the deployment and execution screen will appear in the side panel.
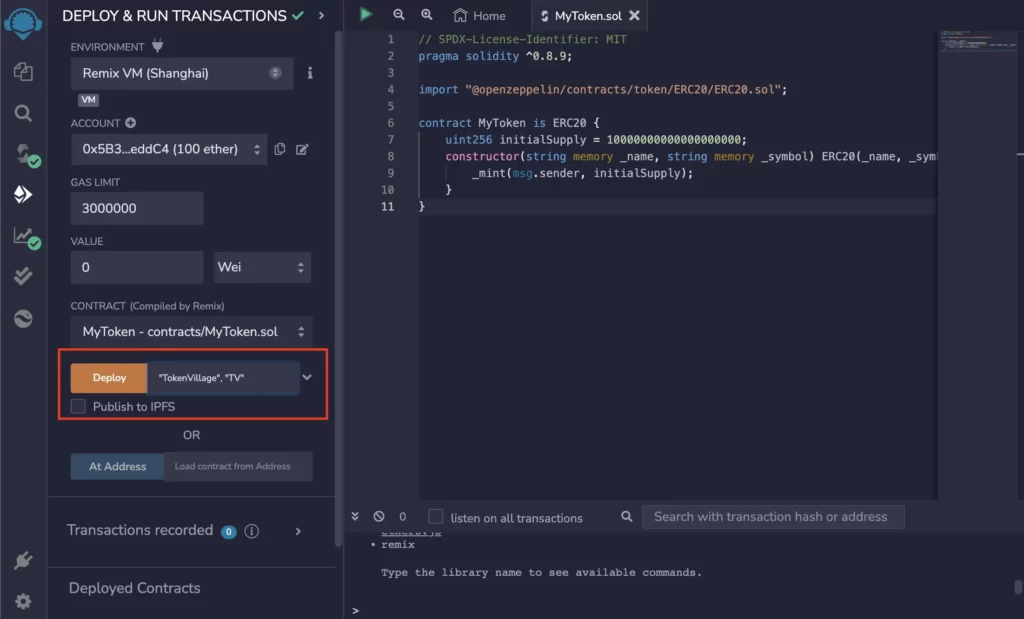
On the deploy and run screen, specify the token’s name and symbol (a 2-3 letter abbreviation) in the red-framed area as arguments, and then press the ‘Deploy’ button. This will execute the deployment, placing the program on the test environment, ready for execution.
Executing the Deployed Program
On the same screen, the deployed program (contract) will be displayed. There are numerous buttons, which correspond to the functions or variables defined in the inherited ERC20.
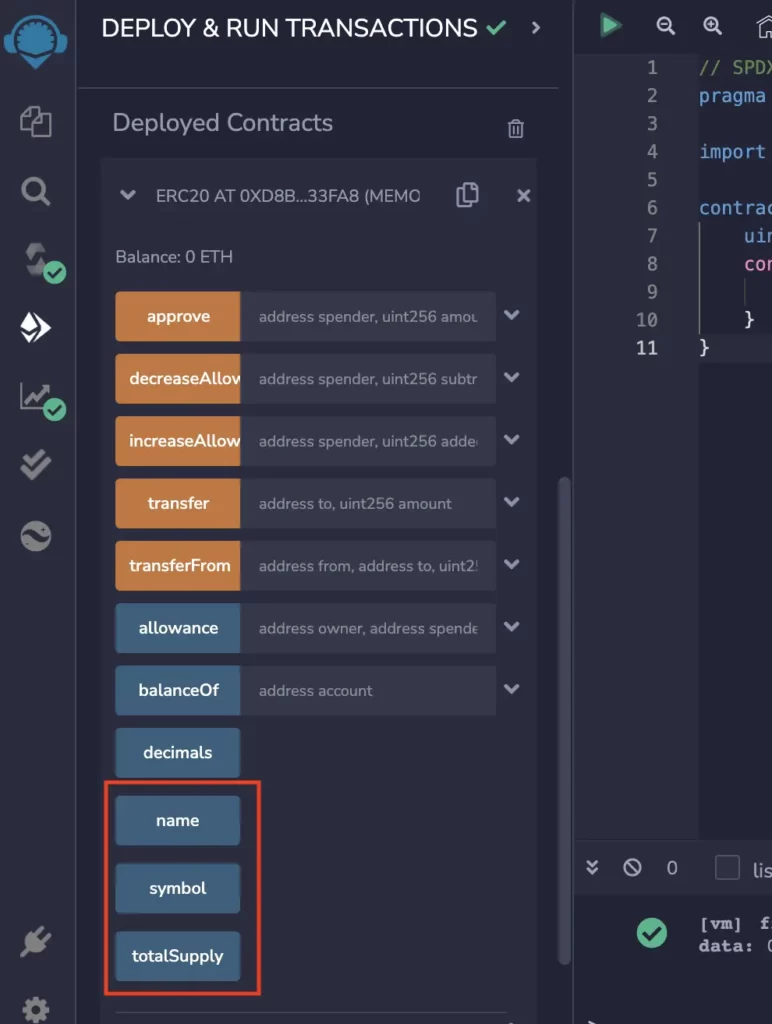
Let’s check if the set token name and symbol values are correctly in place. Near the bottom, there are buttons labeled ‘name’ and ‘symbol’. Click on these to see the values.
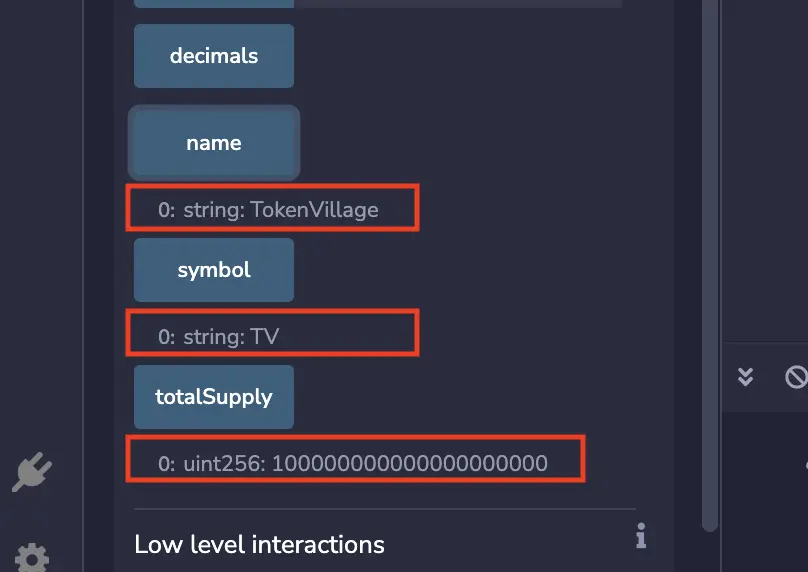
When you press these buttons, the values retrieved from the deployed contract will be displayed below each button.
Conclusion
In this guide, we created a simple Solidity contract (program) using Remix and even managed to try issuing a token.
Please feel free to share your feedback! It will be valuable for improving future content.


Comments