The configuration of Hardhat is defined in a file named hardhat.config.ts. This file includes settings for networks, the Solidity compiler, accounts, and other aspects relevant to Hardhat’s operation.
Hardhat Configuration
The following is an example of hardhat.config.ts used in this guide.
/// 1. Import necessary dependency libraries.
import "@typechain/hardhat"            // Core hardhat library
import "@nomiclabs/hardhat-waffle"     // Library for writing tests, used along with chai
import "@nomiclabs/hardhat-etherscan"  // Library for uploading and verifying source code on Etherscan after deployment
import "@nomiclabs/hardhat-ethers"     // Library to facilitate testing and deployment of contracts. Example usage: ethers object in deployment scripts
import "hardhat-gas-reporter"          // Library to visualize the gas consumption of contracts
import "dotenv/config"                 // Library to easily use environment variables defined in .env
import "hardhat-deploy"                // Library used for deploying. Example usage: deploy function and getNamedAccounts function in deployment scripts。
import "solidity-coverage"             // Library to visualize test coverage
import { HardhatUserConfig } from "hardhat/config"

/// 2. Definition of Constants (Defined as Environment Variables in External Files)
// Below, environment variables are retrieved as constants. These constants are used in the settings (HardhatUserConfig).
const SEPOLIA_RPC_URL = process.env.SEPOLIA_RPC_URL || "https://eth-sepolia.g.alchemy.com/v2/YOUR-API-KEY"
const PRIVATE_KEY = process.env.PRIVATE_KEY || "0x123456789abcdef0123456789abcdef0123456789abcdef0123456789abcdef0"
const ETHERSCAN_API_KEY = process.env.ETHERSCAN_API_KEY || ""
const COINMARKETCAP_API_KEY = process.env.COINMARKETCAP_API_KEY || ""

/// 3. HardhatUserConfig. Actual Settings
const config: HardhatUserConfig = {
    defaultNetwork: "hardhat",
    networks: { // Define the environments to connect to
        hardhat: {
            chainId: 31337,
            // gasPrice: 130000000000,
        },
        sepolia: {
            url: SEPOLIA_RPC_URL,
            accounts: [PRIVATE_KEY],
            chainId: 11155111,
        },
    },
    solidity: { // Define the version of the Solidity compiler
        compilers: [
            {
                version: "0.8.8",
            },
            {
                version: "0.6.6",
            },
        ],
    },
    etherscan: { // Define the API key for requesting source code verification (verify) on Etherscan
        apiKey: ETHERSCAN_API_KEY,
    },
    gasReporter: { // Gas reporter (a tool for visualizing gas costs)
        enabled: true,
        currency: "USD",
        outputFile: "gas-report.txt",
        noColors: true,
        coinmarketcap: COINMARKETCAP_API_KEY,
    },
    namedAccounts: { // Define account information (such as your wallet information) used in deployment and testing
        deployer: {
            default: 0, // here this will by default take the first account as deployer
            1: 0, // similarly on mainnet it will take the first account as deployer. Note though that depending on how hardhat network are configured, the account 0 on one network can be different than on another
        },
        user:{
            default: 1,
        },
    },
}

export default config
The configuration file primarily consists of three parts, and the third section will be discussed further. The details for sections one and two are as mentioned in the comments. In section two, constants are defined and then used in specific settings. Alternatively, settings can directly embed values, for example, apiKey:'${process.env.ETHERSCAN_API_KEY}'.
- Section to import necessary libraries
- Section defining constants (loading environment variables as constants)
- Section with actual settings
HardhatUserConfig
Networks
The network settings example is as follows.
    defaultNetwork: "hardhat",
    networks: { // Define the environments connecting to
        hardhat: {
            chainId: 31337,
            // gasPrice: 130000000000,
        },
        sepolia: {
            url: SEPOLIA_RPC_URL,
            accounts: [PRIVATE_KEY],
            chainId: 11155111,
        },
    },
This defines the environment for deploying and executing scripts. There are blockchain networks such as mainnet (production), testnet (test, Sepolia network in the example), and hardhat (local virtual blockchain network). Each network has an identifier called chainId, which is specified accordingly: 31337 for localnet (hardhat), 11155111 for Sepolia, and 1 for mainnet.
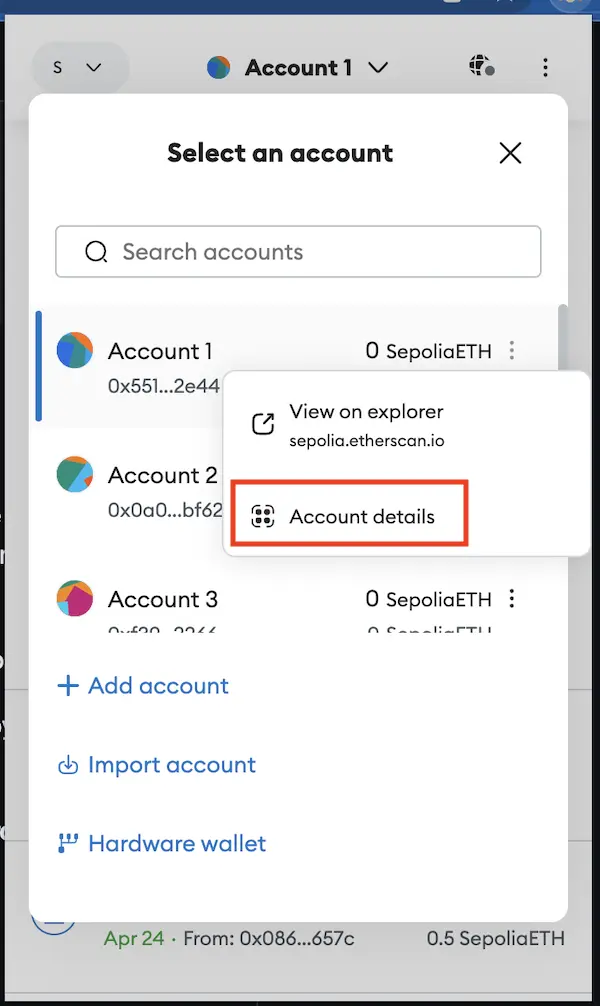
In the accounts section, the private key from a local digital wallet like Metamask is configured (strictly speaking, it’s defined in the .env file and read as a constant).
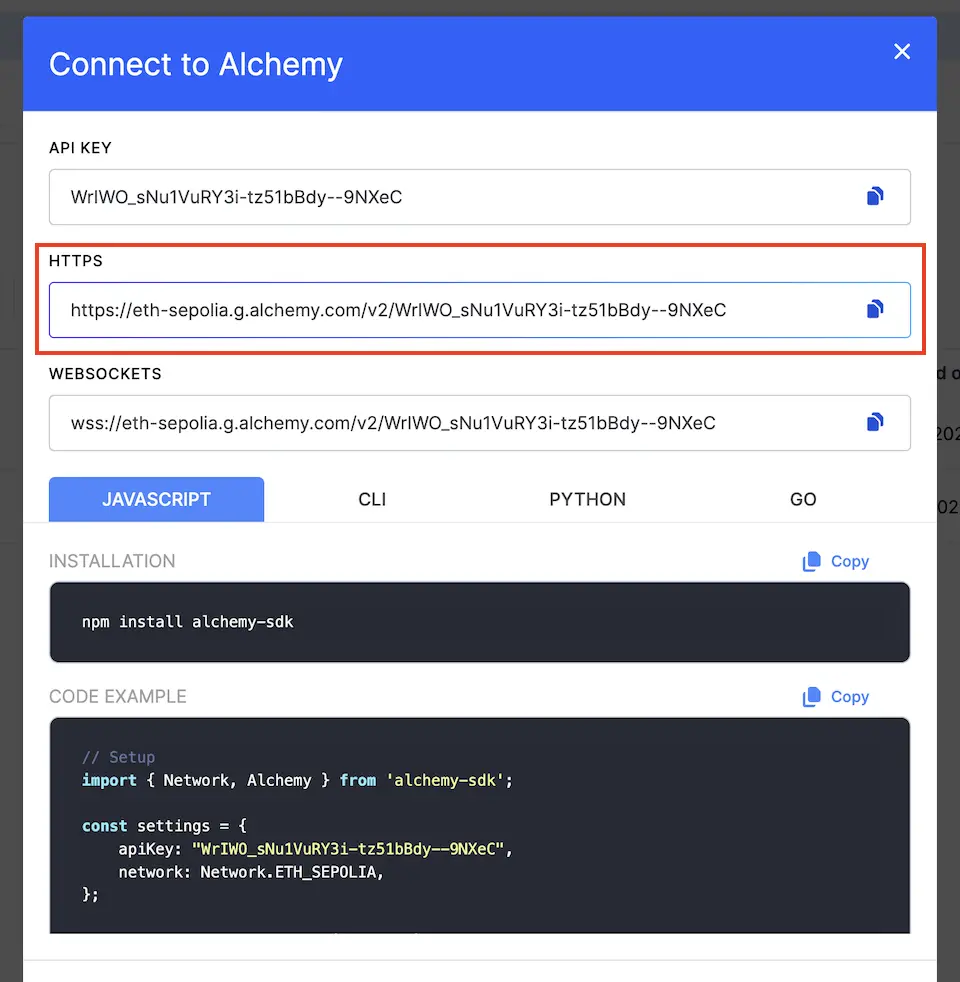
To issue transactions to the blockchain network (such as deploying a smart contract), it’s necessary to connect from the local terminal to the blockchain network. This is done through nodes called RPC (Remote Procedure Call). Imagine it as a communication path connecting the local and blockchain networks. More specifically, it uses JSON-RPC, exchanging information in JSON format. Infrastructure services providing such RPC services include Alchemy, Infura, QuickNode, Moralis, etc. The environment variable SEPULIA_RPC_URL is an individual RPC node created through Alchemy’s service.
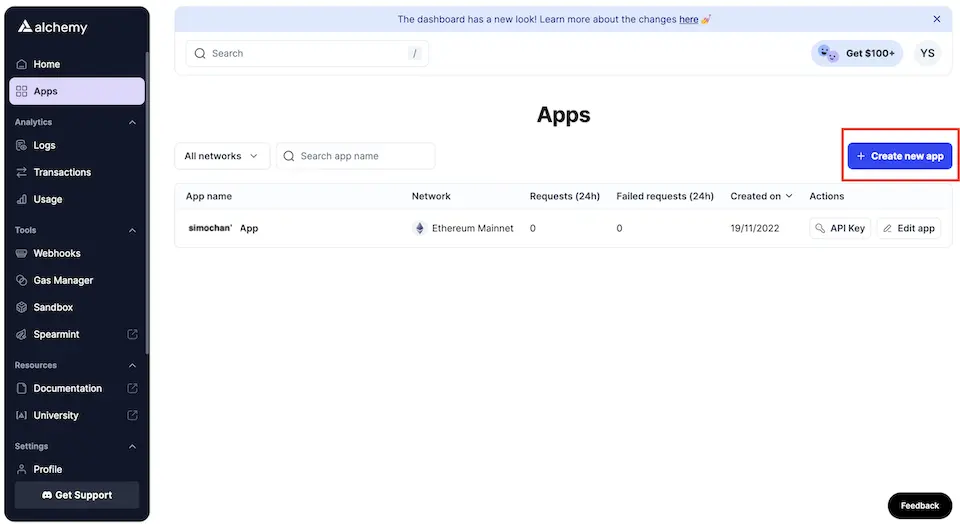
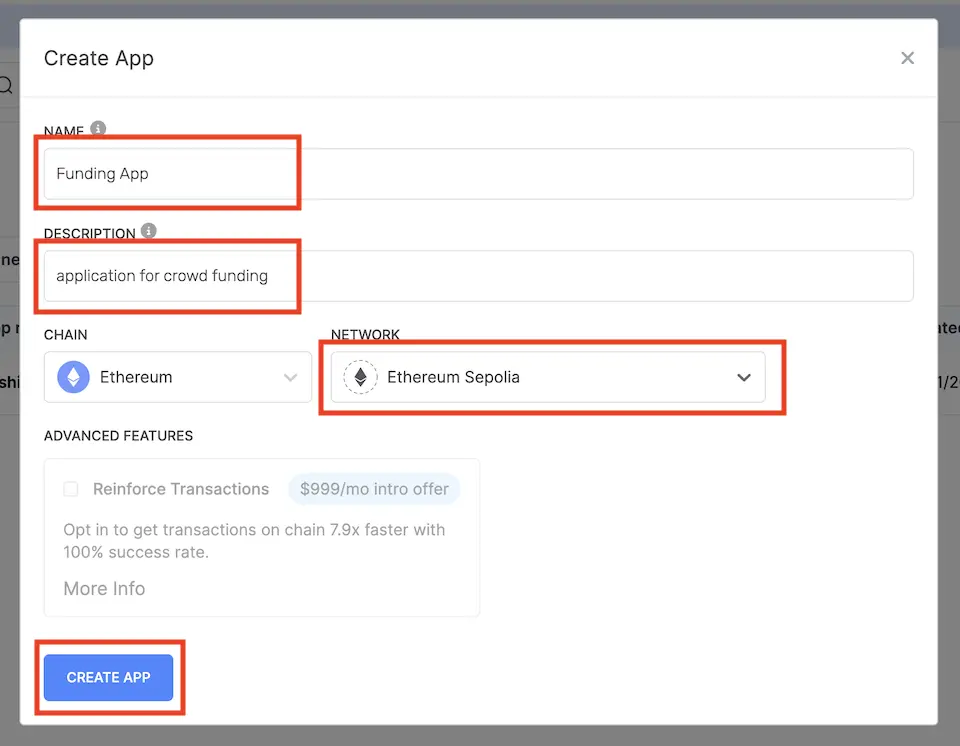
To set up an RPC node, follow these steps on Alchemy’s website.

solidity
    solidity: { // Define the version of the Solidity compiler
        compilers: [
            {
                version: "0.8.8",
            },
            {
                version: "0.6.6",
            },
        ],
    },
In this section, the version of Solidity (compiler version) is specified. It is mentioned in conjunction with the version specified in the actual Solidity source.
etherscan
    etherscan: { // Define the API key for requesting source code verification (verify) on Etherscan
        apiKey: ETHERSCAN_API_KEY,
    },
This section involves setting up the Etherscan API key. Etherscan, as explained in Day 6, is a block explorer service used to view information on Ethereum.
When smart contracts are deployed to the blockchain, they are stored as bytecode. However, it is not possible to directly obtain the original Solidity source code from the bytecode. This is due to the difficulty of reverse-compiling the code, and even if possible, the original source code’s comments and variable names cannot be restored.
Therefore, to maintain the transparency of smart contracts, developers need to publish the source code and verify (prove) that the deployed bytecode was compiled from that source code. This allows others to verify the contract’s operations and assess its reliability.
Etherscan provides a feature to verify contracts, and the Etherscan API key is registered in the deployment script to automate verification in the script (the API key enables automated verification within the script).
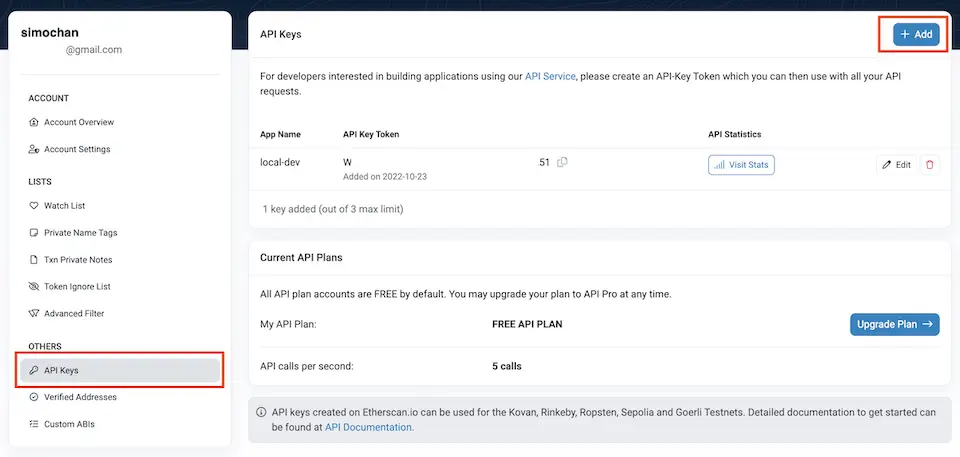
Obtaining an Etherscan API key can be done by creating an account on Etherscan and then generating it via API Keys > +Add, as shown in the diagram.
gas-reporter
    gasReporter: { // Gas reporter (a tool for visualizing gas costs)
        enabled: true,
        currency: "USD",
        outputFile: "gas-report.txt",
        noColors: true,
        coinmarketcap: COINMARKETCAP_API_KEY,
    },
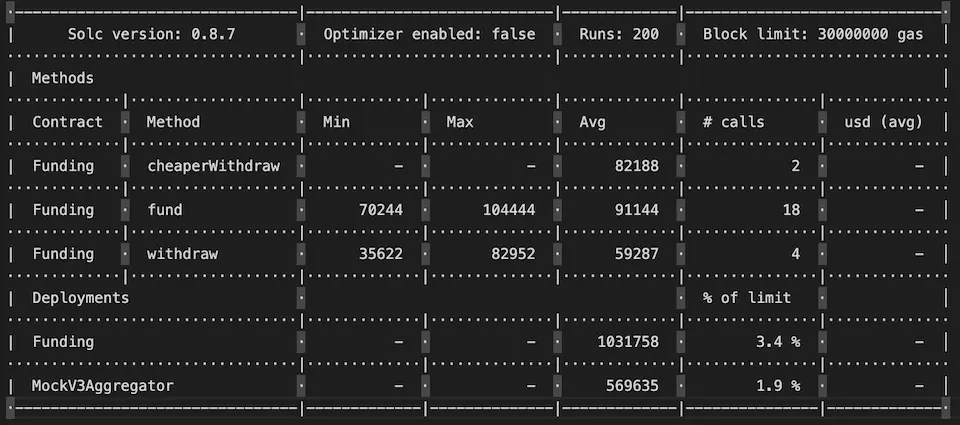
This section holds the settings for gas-reporter. gas-reporter is a tool for reporting the gas consumption of smart contracts. It measures the gas usage of each function and transaction during Hardhat tests and generates a consolidated report.
The following image is an actual example of a gas-reporter run. It lists gas values (minimum, maximum, average) for each function. Such visualization helps identify which parts of the code consume more gas, aiding in improvements towards lower consumption (detailed in Day 25).
namedAccounts
    namedAccounts: { // Define account information (such as your wallet information) used in deployment and testing
        deployer: {
            default: 0,
            1: 0,
        },
        user:{
            default: 1,
        },
In this section, you can define accounts to be used in deployment and test scripts.
In the example above, an account named deployer is defined. It specifies that by default, the 0th account from the accounts list is used, and for chain ID 1 (mainnet), the 0th account is used as well. Instead of the number 1, network names like ‘mainnet’ can also be used. Similarly, an account named ‘user’ is defined, setting the default as the 0th account.
The accounts list, as mentioned in the networks section, is set for each blockchain network and is generated from private keys or mnemonics.


Comments